Pieces of Me
Posted: December 11, 2014 Filed under: Uncategorized 1 Comment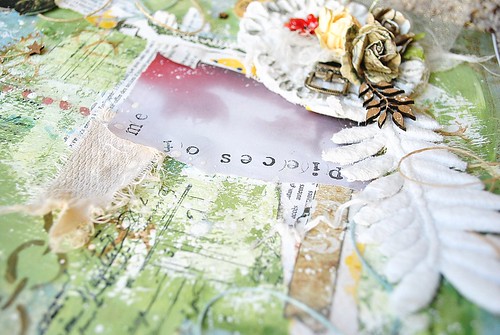
Lately, I have felt a bit like a person trying to find their way in a dark room. Bumping into furniture, gingerly reaching out to find the way out into the light. I’ve been caught in a strange, unpredictable and demanding work schedule, and then…wham…I was sick with pneumonia. The pneumonia was a way to knock me back a little and force my body and mind to rest. Oh…and in all of this, I had to go cold turkey off of my depression and anxiety meds, adding dizziness, brain shocks, and crushing fatigue. After this long complaint, I have to say….I’ve made it through. I’m still recovering. I’m still learning how to put one foot forward, devote any extra time to my family, leaving behind very little for myself. As a creative, expressive, artistic individual, my time for releasing all that is good, very bad, and imagined…really doesn’t exist much. It’s been a struggle to find the pieces of me, and put them into an order resembling what I once knew. Maybe that’s the point of all of this. Maybe I am meant to be a Picasso right now…..and not a Rembrandt.
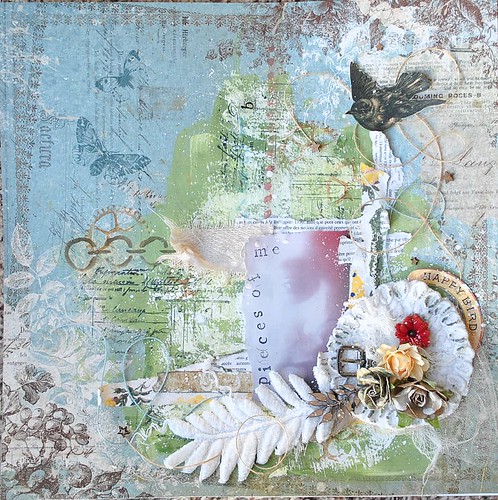
BUT, recently I found a few hours to create…and I made this layout using the Scraps of Darkness kit Serenade. It’s AMAZING. Full of Vintage inspiration. I added some fibers I had collected, after cutting apart an embroidered shirt. I like the collage feel, but keeping with my style. I’ve been very inspired by the book “The Art of Personal Imagery” by Corey Moortgat. You can find it here, though I have just checked it out from our local library. Three times. hehe.
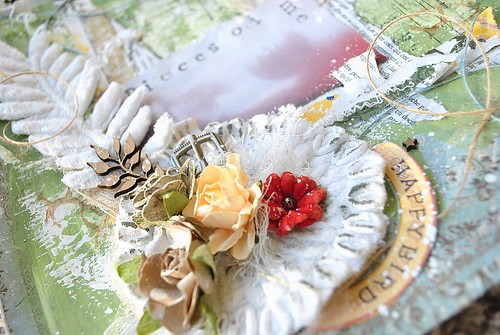
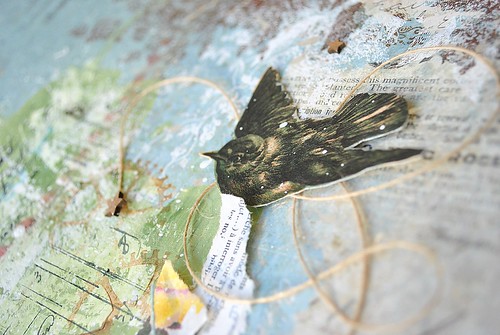
I love the vintage feel to everything in the kit. It was easy to grab the lovely flowers, and this sparrow. I fussy cut the image from the ephemera pack, adding the “happy bird” bit, and the bird separately. The twine was fun to add movement here and there. I love to swoop around with twine and thread, like it just naturally fell like that. It’s funny that it doesn’t…that takes some work. 😉
Thanks for having a look today. And for reading my pity party. The pieces of me that feel a bit like they’re jumbled up right now.
Peace, love, and Gnomes,
Amy
A Merry Night of Time Travel {VLVS! Christmas Card Blog Hop}
Posted: December 8, 2014 Filed under: Uncategorized 13 CommentsWelcome to the Christmas season here on The Sparkling Gnome! We’re kicking it off with a Christmas card blog hop with Viva Las VegaStamps!
I have created a fun little card to shine with Christmas spirit, without a single Christmas specific image! Today I am giving a shout out to Dr. Who…and thinking of how the TARDIS would look, sailing across a sky of Christmas stars, sending a Christmas greeting.
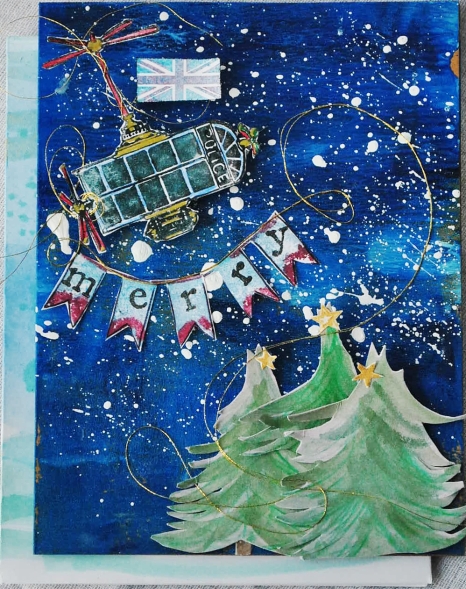
The background of my card was created by adding many colors of blue on my Gelli Plate, and then spreading with a brayer. When this was dry, giving splatters of white ink from 13 Arts, gave me a nice night sky to work with.
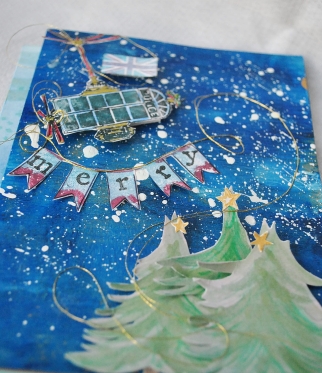
I painted the watercolored pine trees, fussy cut them out, and added them in layers. Each tree is topped with a star from the Stars 2 x 2 1/4, using gold ink from Imagine Crafts.
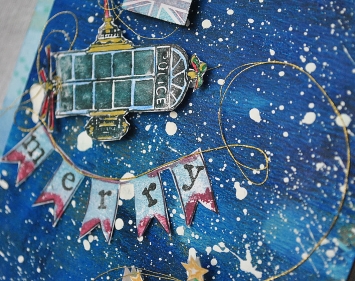
The whimsical flying police box stamp is focus of this card, obviously. I decided to stamp it in several colors of blue, and then color with Sakura Gelly Roll pens, Faber Castell Design Memory Craft big brush pens, and fine line Sharpies; for pops of color. I wanted the TARDIS to be flying the Union Jack, so I stamped it using the union jack silhouette, and added it and the chevron banner stamp, using shimmering gold heavy embroidery thread….like they were being flown. The entire card was added in a layer to another white plain 4×6 card, which was watercolored to give a lighter background pop of color.
Thank you SO much for stopping by today. Please continue hopping, to see the amazing work of the other design team members. Here is the list….so keep on hopping, jingling and ringing your bells…because you could win a pound of rubber, or a grab bag of Christmas images!! Meeeeeerrrry Christmas! 🙂
Viva Las VegaStamps!:http://vivalas.blogspot.com/2014/12/christmas-card-blog-hop.html
<——-Amy Lassiter (that’s me! You are here!)—->
Dee Dee Catron–http://deedeecatron.blogspot.com/2014/12/christmas-card-hope-viva-las-vegastamps.html
Glenda:http://somewhereovertherainbowunicornsdream.blogspot.com/2014/12/viva-las-vegastamps-christmas-card-blog.html
Hermine: http://wp.me/p2KNz-3dE
Nataliya: http://ur-la-la.blogspot.com/2014/12/viva-las-vegastamps-bloghop.html
Tera:http://thecraftysugaraddict.blogspot.com/2014/12/tis-season.html
Have a Merry Christmas, and enjoy the holiday season!
<3, Amy
Artist’s Trading Block Tower {Block Hop}
Posted: November 17, 2014 Filed under: Uncategorized 2 Comments
Welcome to the Artist Trading Block hop, with 100 Proof Press stamps and Team ATB combining to create inspiring projects with artist trading blocks! Today I’m sharing a tower of blocks I created with all sizes of blocks available.
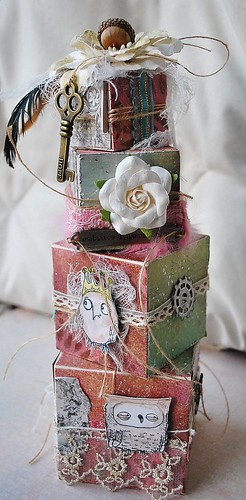
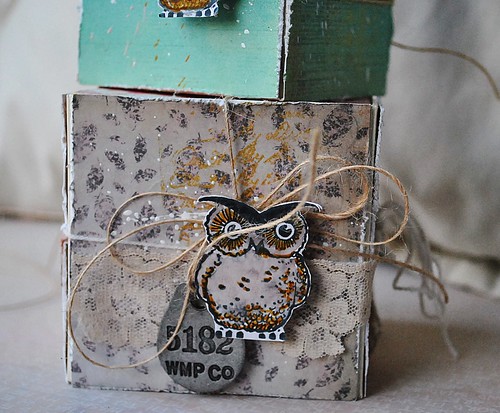
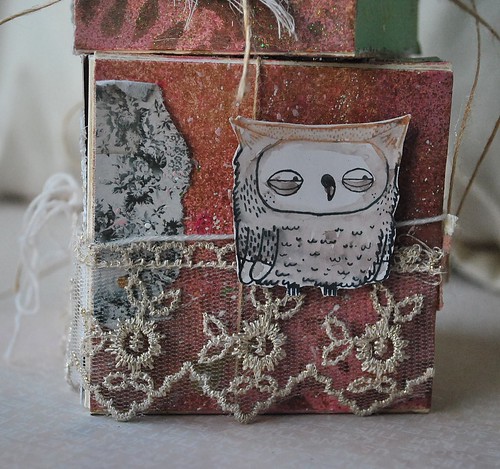
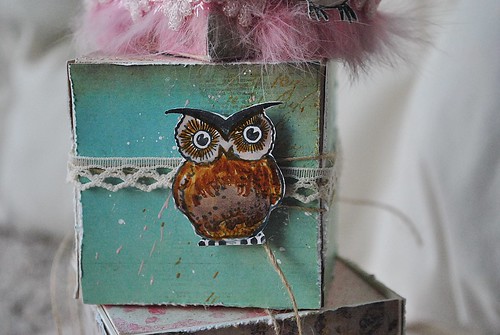
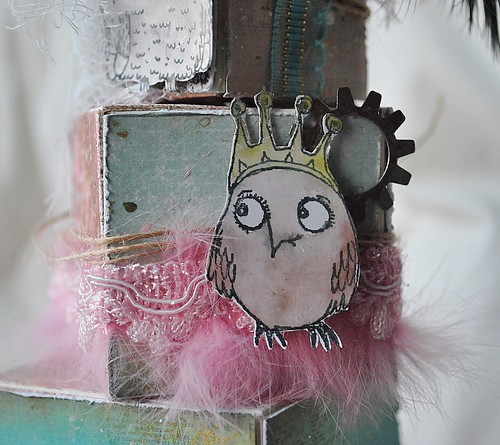
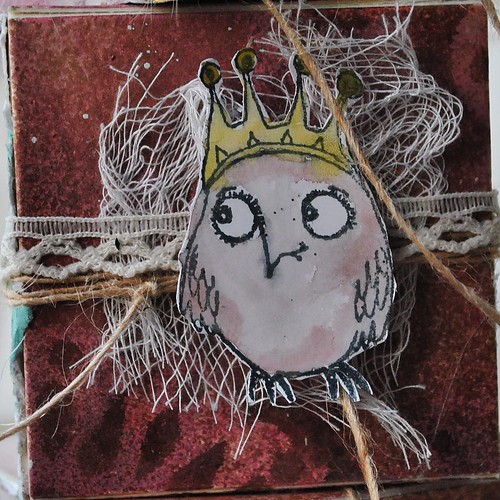
I made my blocks “artsy girlie,” with plenty of paint, lace, stenciling, stamping and more. I love owls, so I wanted the owls from 100 Proof Press to take center stage.
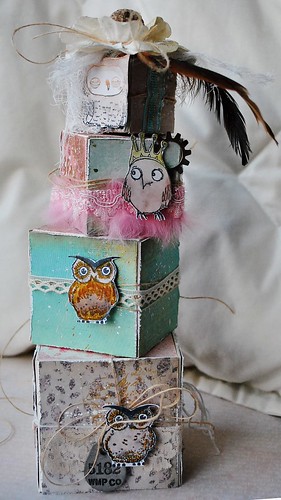
The bottom two blocks, I spread out, and before assembling them, used my gelli plate, stencils from Stencil Girl, paint, and mists, and layered them full. I then splattered paint all over them, in light and metallic colors. The top two blocks were covered in papers from 7 Dots Studio’s new collections, and also splattered on for the glitter fun. After stamping with black ink, I colored the owls with Pitt Big Brush pens from Faber Castell Design Memory Craft, and used watercolors for softness. The edges of the blocks are also distressed.
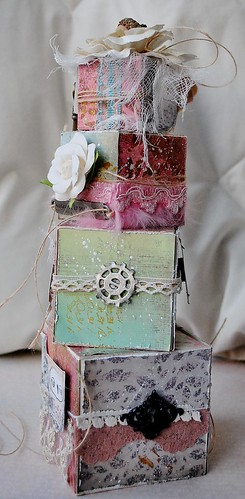
Layering on trims and little bits of metals, flowers, and feathers, really added to the sweetness of the whole project. Here’s a look at some of the individual block sides:
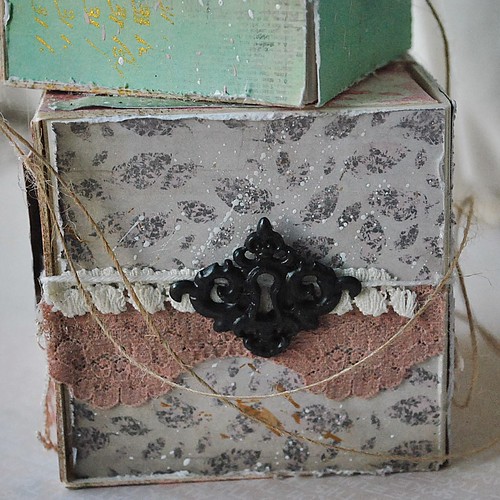
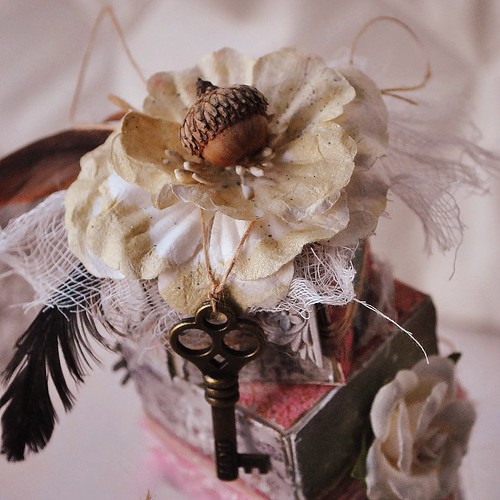
Finally, I topped off the tower with a fallish flower, feather and acorn flourish, with cheesecloth underneath. A key hanging brings the eye down. 🙂
Thanks so much for having a look today!! I’m so grateful you stopped by to have a look. Please stay tuned for the other amazing takes from the two teams! And if I inspired you, you might fancy subscribing? I would be so honored! Thank you, again!
Hugs,
Amy
Altered Binder Book (upcycled)
Posted: November 13, 2014 Filed under: Uncategorized 1 Comment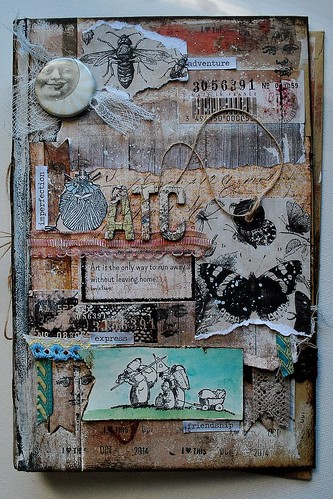
Hello friends. It has been so long. Before I get to sharing my project, I have to say it’s lovely to be back here blogging. A little less than a month ago, I got a job at JoAnn Fabric and Crafts. I like the job, but it has taken away my creative time, or really most personal time. I work strange hours (one day it’s 9-5:30, the next it is 1:30-10 pm, but usually I get home at 10:30 or so), and I work nights 3-4 days at a stretch. This is my first day off in 7 straight days. I spend my “spare time” sleeping, sadly, just trying to keep up and not get sick. All of this is discouraging, but necessary for our family financially. I’ve never worked retail before, and I’ve learned a lot…about myself, people, shift work, and more. I’ve been forced to make some tough decisions with my creative teams, and that’s made me depressed. I guess I wasn’t expecting such a huge shift in my life patterns. I’m grateful to my wonderful husband who keeps things going, gives my girls the time they need, keeps up with housework and fixing meals. As usual, he always comes through in my tough times. But on to today’s share.
I created this little folio to keep ATC cards in. It could be used for anything, a journal, project life, photo album, mini album. In fact, it would be better for that than ATC’s, because of it’s size, but I was working with a discarded hardback book, and this was the size I had to use! Here’s a quick step out tutorial I’ve made into a video, to show the process:
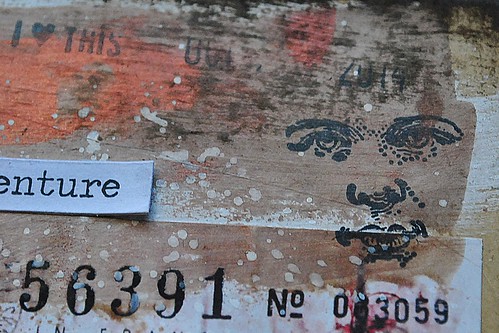
Here’s a closer look at the details, like the layering I have done, with paper, trims, and of course stamping. All of the stamps (other than the roller date stamp from Smash) are from 100 Proof Press.They added some whimsey, fun and color to the vintage/distressed palette.
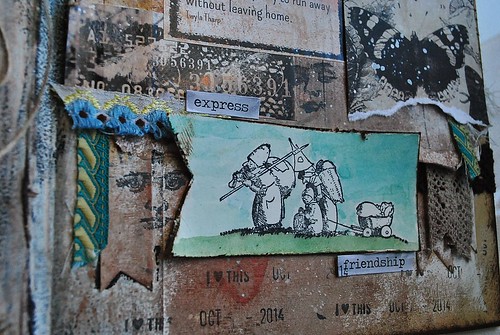
I love these little gnomes moving house. I mean….I relate so well. hehe.
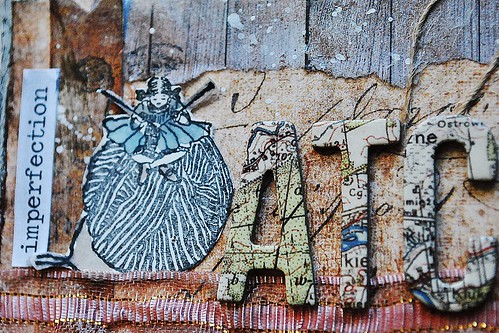
The four sided cube depicting the faces of ladies was fantastic for adding a bit of interest here and there. I like to make things random, if you haven’t noticed.
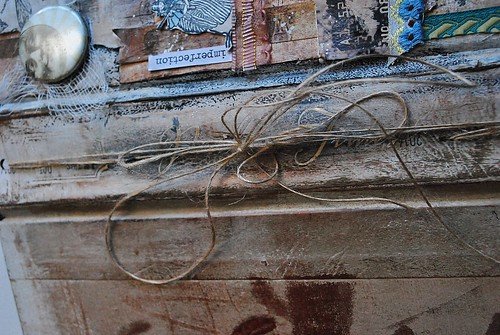
You can definitely see more details in the video, of how I created the binding and the book itself, but I love the laces using May Arts twine. My daughter’s friend said it looked like “a special secret book from a movie.” That made me excited for sure.

I’m definitely pleased with the outcome, and I love that I have a place to contain the tiny bits of art I create on ATC cards….even using the whole folio.
Thanks so much for visiting today, and pardon my absence. I have never missed you all more…and you’re in my heart.
Love,
Amy
Live Your Passion- {VLVS! and TCW blog hop}
Posted: October 30, 2014 Filed under: Uncategorized | Tags: mixed media, the crafter's workshop, viva las v 2 Comments
Good Morning, and welcome to the Viva Las VegaStamps! and The Crafter’s Workshop blog hop! Today I am sharing a layout with both of these amazing products.
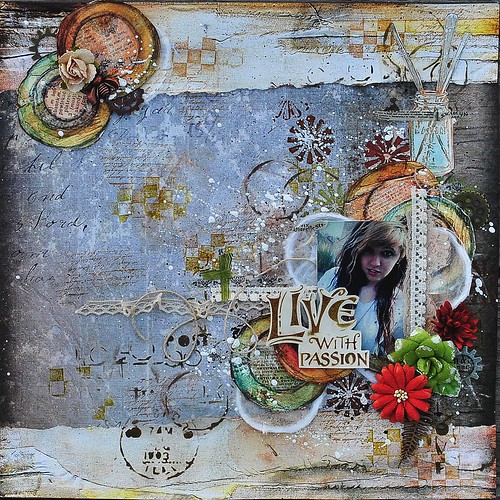
If you’ve been following me for a while, you will know I’m all about the layers! With both stenciling and stamps, it’s easy to create layers of ink and paint, for sure. I began with a piece of 7 Dots Studio cold country paper, and added top and bottom paper layers from the dreamer collection. I then layered on paint, using The Crafter’s Workshop Stencil 439, Retrobursts.. Next I layered on some paint splashes and splatters, and then used the Love Post stencil with black ink, as well as distress inks in rust and olive. I used the stencil randomly, and it created the look I was wanting around my photo.

I next stamped using the VLVS! image “paint brushes in jar”, creating a gradient with rust and black inks, and coloring the inside with blue distress ink for a water illusion.
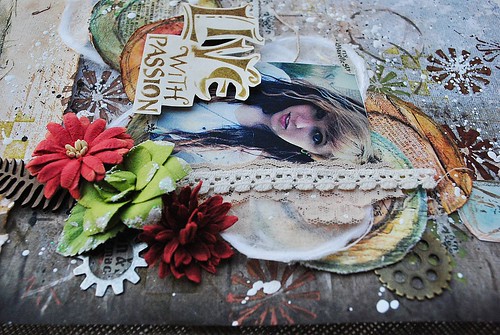
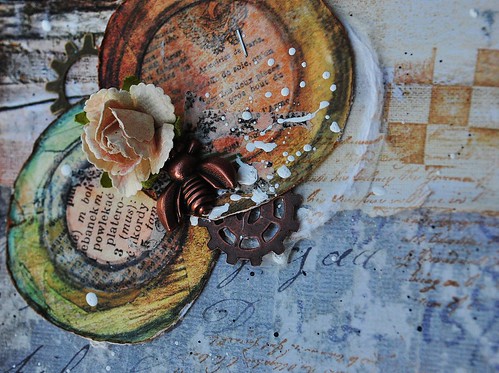
I layered up fussy cut bits from the dreamer papers, along with some gorgeous specialty papers and trims I picked up in Chicago. When that was complete, along with embellishing, I added stamping in random areas near my cluster, using the checkerboard and grunge 1787 background stamps from VLVS!
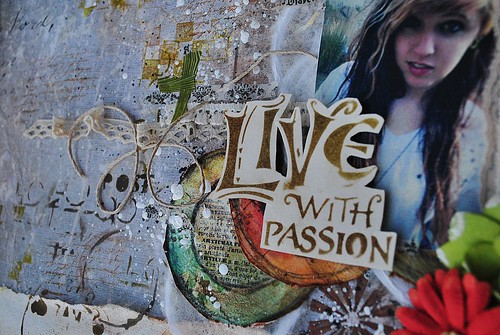
Finally, I stenciled a phrase from the TCW Live, Love, Laugh stencil, mixing up the phrases a bit to create “Live your passion”. This was stenciled on a heavy piece of cardstock using distress inks, and fussy cut along the top.
I really like my latest creation, and I hope you did too? Maybe you were inspired to create with stencils and stamps? I know I am always grateful to be a part of the Viva Las VegaStamps! team, and working with The Crafter’s Workshop has been fantastic…a big thank you to them!
Have a great Halloween, friends!
Lots of gnome kisses~
A
No one really knew Agnes….
Posted: October 7, 2014 Filed under: Uncategorized | Tags: collage, etsy, mixed media, scraps of darkness, the sparkling gnome 2 Comments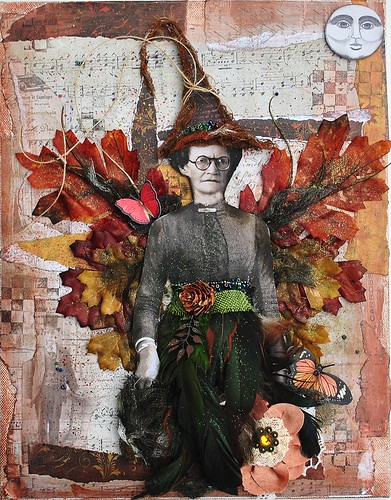
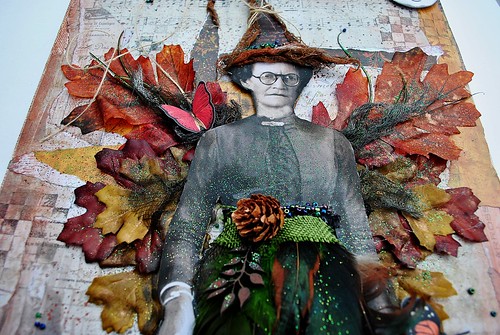
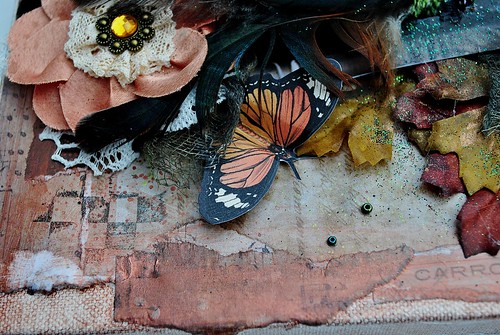
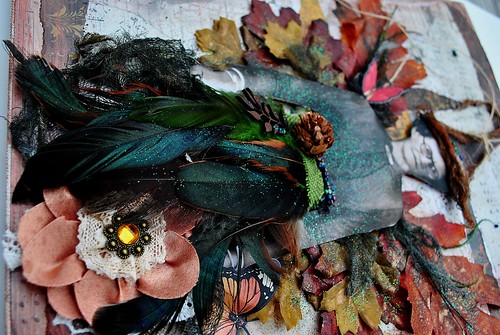
This…is Agnes. She’s my muse today. Not a beautiful woman, but deeply interesting. I created a whole story for her, using my imagination, a vintage photo from my Etsy shop, a 9×13 canvas, the newest Scraps of Darkness kit, Transitions, and stuffs from my stash. I created a collage of papers, vintage style and the beautiful fall themed papers from the SOD kit. I also used a copper paint wash around the edges, and stamping with Viva Las VegaStamps checkerboard stamp. The photo has been altered to include a body for Agnes, and she has been embellished with really cheap faux leaves from Michaels ($1 for 10), feathers, and the beautiful embellishments in the kit. She is my first “muse,” there will be more for different seasons. 🙂
Here is Agnes’ story:
Agnes Mary Stone had grown up in a small village in the newly established American Northwest. Her grandparents had arrived from Ireland two decades previous, after suffering religious and financial hardship. Agnes was a sullen girl….and married off with a healthy dowry to a man who cared very little for her, but was involved in the logging industry. She bore 5 children to him, and they lived in a small log home with a thatched roof, deep in the woods. Now that she was a matronly older woman, and their children had grown and left for the city, Agnes was alone very frequently.
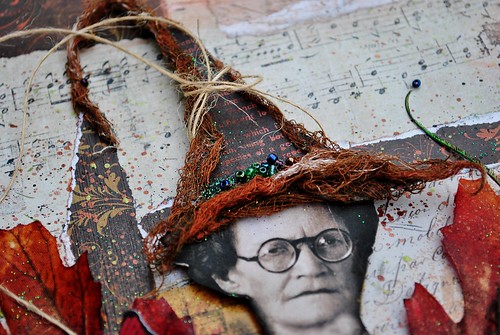
One day Agnes was looking through a trunk of things that had belonged to her ancestors. Inside the truck was an old book, bound in leather and the pages were so old, they were falling apart. Agnes then discovered her family had been more than she ever understood.
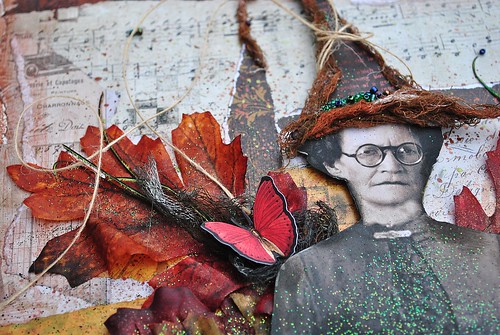
Alone on the night of Samhain, Agnes decided to make an offering, using a spell within the book. With a fire lit in the yard, blazing hot….Agnes became something else. Something at one with the nature surrounding her. She became something mystical, magical, and powerful. Agnes…was someone no one had ever understood, someone no one had ever imagined was more than meets the eye. But now….Agnes was someone who would forever be remembered.
As the witch of Seneca forest.
Thanks for having a look today. Agnes and I are grateful. 😉 Have a splendid week ahead.
Loves,
Amy
The butterfly
Posted: September 30, 2014 Filed under: Uncategorized 3 Comments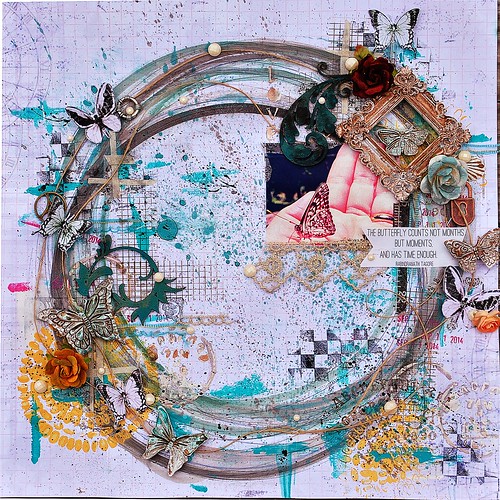
Hello and happy Tuesday! I spent the day yesterday applying for jobs, which can definitely suck the wind from your sails…but today is new, and I’ll keep my fingers crossed that I hear back from someone soon. 🙂 Today I’m sharing a special bit I made for the 13 Arts September challenge, which is still ongoing, so feel free to get in on it. The rules and inspiration by the other amazing artists are here.
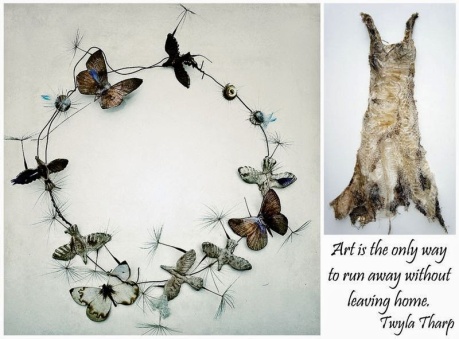
This was the amazing challenge mood board. You can see the inspiration I drew from it. I had the perfect photo for this challenge, too. I had been sitting outside one summer day, when a butterfly landed on my toe. The butterfly gracefully moved from my toes, to my nose, to my hand. It let me pick it up and look very close in it’s eyes. It was a magical experience that lasted about 20 minutes. I’m glad I had an ability to photograph this moment to keep it forever.
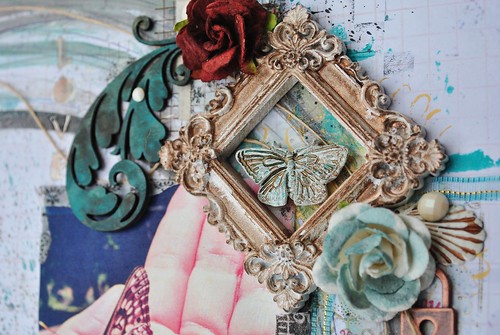
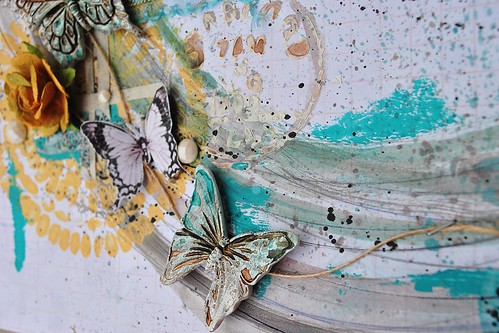
I used Prima resin frames and butterflies, and antiqued them with mists. I had a whole video of this background technique ready to go….but it is sadly stuck inside the “good” computer, because the power cord fizzled out. SAD face. The background uses my circle template and mediums in many layers. Along with papers, stamping, stenciling and more.

The amazing UmWowStudio chipboard flourishes added so much movement, it made me giddy. 🙂

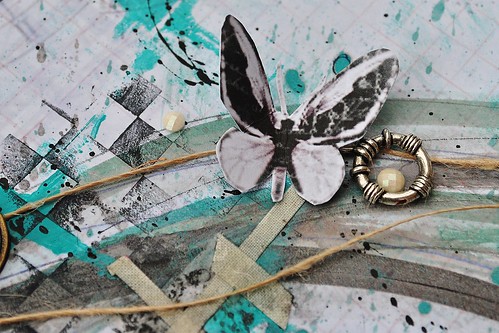
Who knew that a ouija board stamp would make an awesome background, with a little masking?

And finally the sentiment sticker from 13 arts….just perfection.
I hope my little summer breeze into this fall helped brighten your day a little. I really enjoyed creating this, and sharing is a true treat as well. ❤
Love and gnome kisses.
Amy
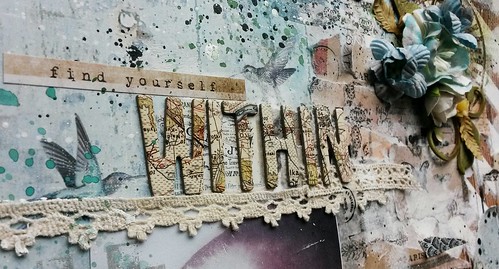
Find Yourself Deep Within
Posted: September 29, 2014 Filed under: Uncategorized 1 Comment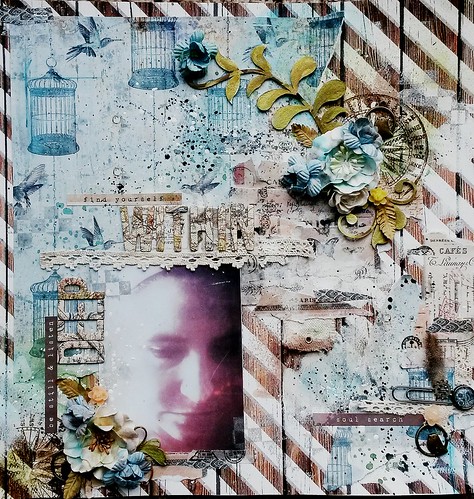
I tend to be a very emotional person. I’m sensitive to a fault, and sometimes things get a little out of control in my head. I know these things make me good in the fine arts. I sing with deep passionate emotion, I make art that means something….that isn’t just something I want to impress people with. Sometimes I grow tired of just trying to capture attention for my talents, but at the same time, I do like to share it and be loved for what I’ve created. The older I’ve gotten, the more I like what I find inside, when I look deeply. As a young woman, I only saw faults, and really I had very few physical faults, but I was not what I am inside now. Difficult time have made me strong, and wise, and in touch with what I want from myself, and the rest of my life. So, I created this layout. Reminding myself to stop disliking what I have on the surface, and to look to my heart and soul. Much deeper inside is the good stuff. 🙂
I used this month’s Scraps of Darkness kit, Weathered and Worn. The colors in this kit are my jam. The honey in my tea. 🙂
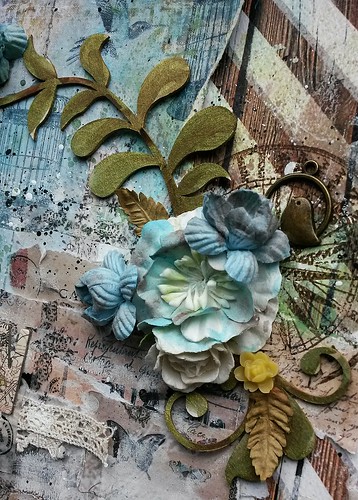
I love the pale blues in the Fab Scraps papers in the kit. The birds in flight, the calmness. I grabbed those in my design and ran with them. I have discovered I can take any paper flower and scrunch it a bit, adding mists and paints for maximum happiness.
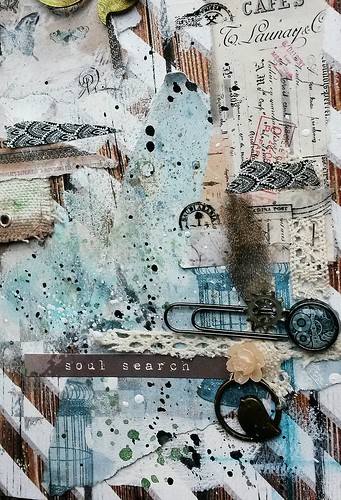
Most of all, this layout is about layers. It’s about the layers I peel back to reveal myself….to myself. Just like I do in my art.
Thanks so much for having a look today, and I hope you’re having a mystical, magical autumn.
~hugs from the gnome hole.
Amy
She Believed
Posted: September 24, 2014 Filed under: Uncategorized Leave a comment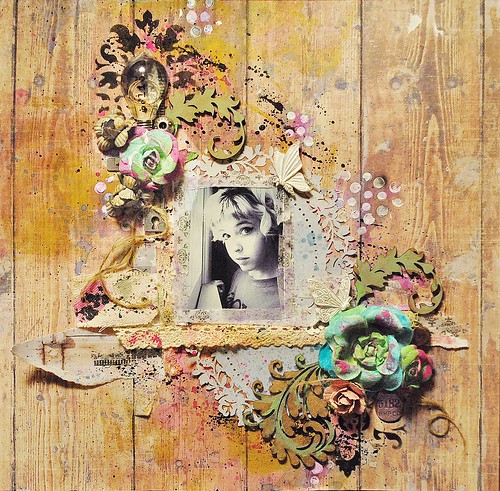
Greetings, friends! 🙂 I am so behind in blogging my projects, mostly due to my crazee computer….which overheats so fast, I don’t have time to get a whole post finished. Sigh. Sadness. BUT….I’m sitting with a full sized fan focused on the hot part of the processor. I need to get these projects into the bloggosphere.
The project I’m sharing today, is one that I love so much. I made this using the Scraps off Darkness August kit, “Weathered and worn,” along with a lot of UmWowStudio goodies….swoops and swirls of prettiness. 🙂
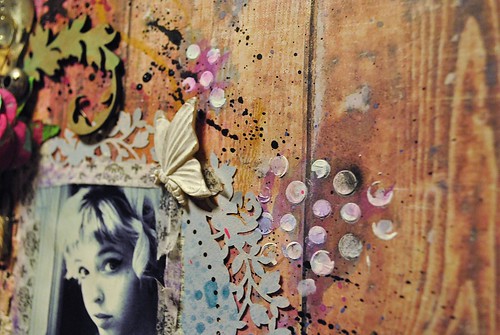
I created the layered background, but wanted a lot of the cool background paper with the painted wood background to shine through, so I kept things tightly toward to the middle, and layered papers from there..
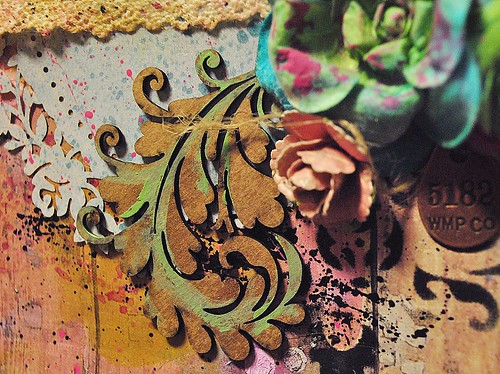
I used an UmWowStudio stencil to give nice texture, and watercolor gave a wash of controlled vibrant colors, that worked with the feminine background. The flowers are also boosted with acrylic paint for color pop.
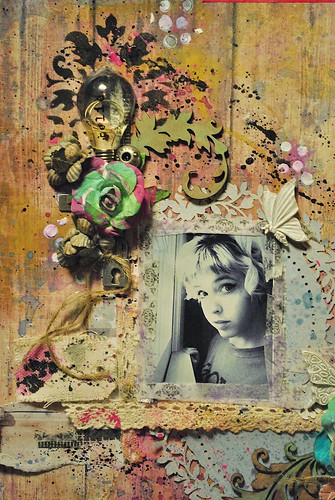
The doily from the SOD kit, I cut in half, to add in sections. I loved how it gave movement, just like the umwowstudio flourishes. One of my favorite parts in the Ingvlid Bolme lightbulb that sits on a bit of stenciling….it looks so baroque and delicate, with a steampunk touch…which of course makes meeeeeeee happy.
Thanks for having a look today. 🙂 I will be back very soon with plenty of projects to share.
Hugs!~
Amy
Dream Catching
Posted: September 18, 2014 Filed under: Uncategorized 2 Comments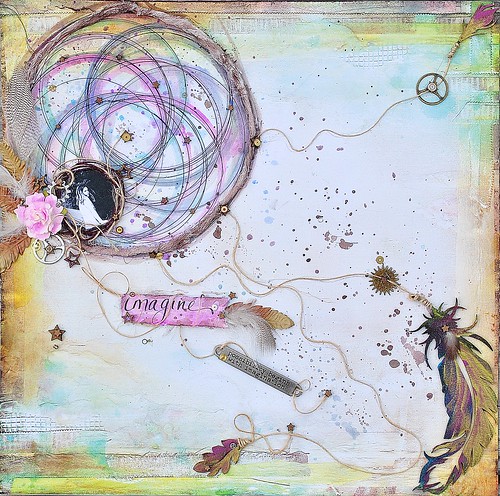
Good afternoon! It’s so good to be back here blogging in the gnome hole, after another trip back to Kansas for some hard outdoor labor. 🙂 Today I’m thrilled to share a layout I made for Scrapki-Wyzwaniowo’s September challenge…which is simply one word….IMAGINE. 🙂 The prizes for the winners of the challenge are phenomenal. New and present 7 Dots Studio collections, sent to your door. I can’t imagine why you wouldn’t want to play!
But on to my layout.
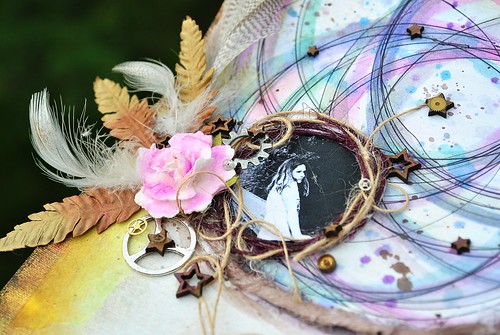
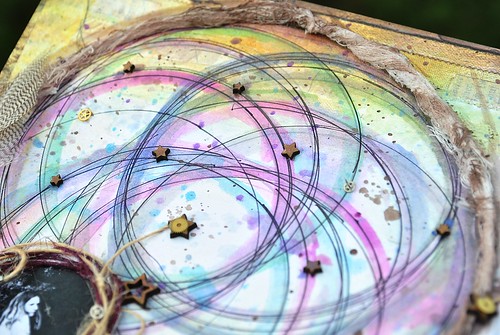
For a long while, I was not fair to dream catchers. I liked the lovely thought of the native American tribe that created them, and their idea. I wasn’t too into making them, because I wasn’t all that crafty when dream catchers were big in the 90’s. But recently they’ve made a resurgence, and I have begun to love them for all they represent. For this page, I created the dream catcher using cheesecloth for the “frame,” doodled circles for the center, and twine and chipboard for the strings and embellishments. It’s funny that when my family first saw this, they didn’t even notice the photo of Ivy tucked inside the center of the dream catcher. haha.
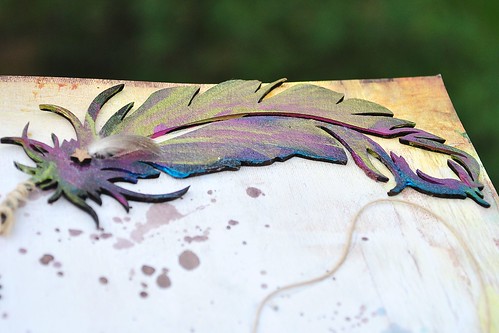
The gorgeous UmWowStudio chipboard feather was painted with acrylics to give it the rainbow of colors. I wanted it to look like the dream catcher was being blown by the wind, so I had the twine move across the page, tossing the feathers where they would be moving in my mind’s eye. The little feather is part of the feather trio, and it was also painted in acrylics. Both were wrapped in May Arts natural twine.
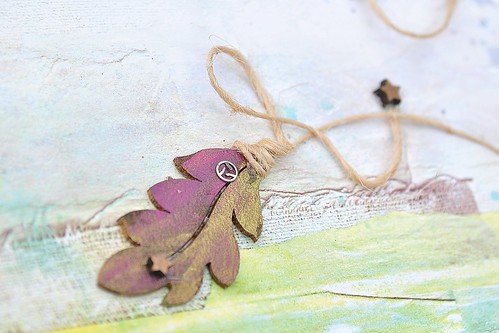
I used this leaf from the 7 Dots Studio chipboard to add another floating bit.
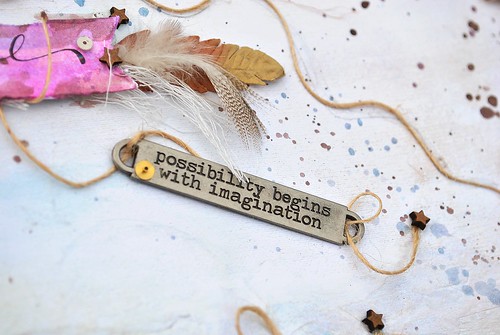
I sprinkled lots of UmWowStudio confetti throughout the project, as well as vintage watch parts and gears, hand wrote the “imagine” tag (and watercolored it), and finally added a metal sentiment from Tim Holtz to finish it out. Watercolor was also a big element to this project….it’s just so dreamy. You can never go wrong with watercolor. 🙂 The 7 Dots Studio “Dreamer” paper made the perfect background.
I’m so happy with how this came out, and hope maybe my readers will give a dream catcher a try? It was a freeing and very fun experience.
Thanks so much for having a look, and I’ll be back soon with a new tutorial video and project for 13 Arts!
Loves~
Amy